Over the past year I have become a regular visitor as well as "consumer of information" on this site. I now see an opportunity to give something back to this community and would like to offer my observations and opinions of the Ebony SV45U. In order that you the reader may be able to better judge my LF skills and knowledge and how it relates to a camera review, I have included a brief overview of myself as a photographer so that you may be able to put into perspective all that I am about to share.
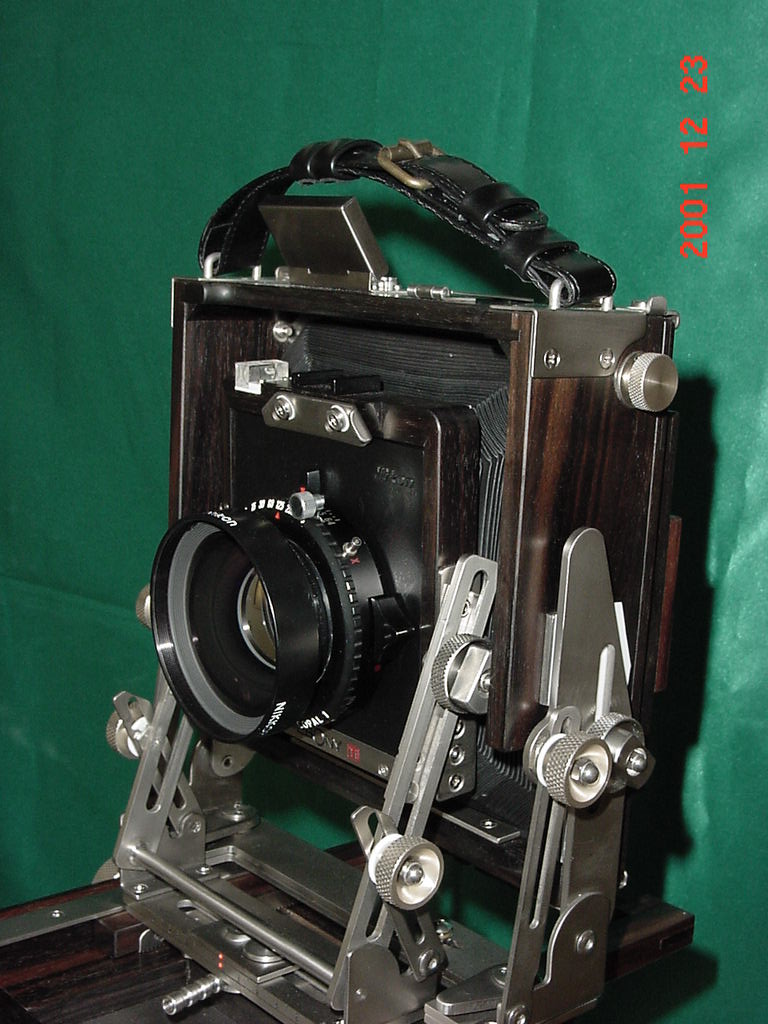
I feel that the SV45U is an ideal camera suited to the type of photography I shoot as well as provide any option except "rear shift" for any challenges that I come upon in the future. This camera is incredibly solid and is equal to my Calumet 400 for rigidity at full extension. Although this may not sound like much please keep in mind the portability of a field camera (SV45U) as well as the weight reduction and added functionality such as asymmetrical tilts and rear rise is indeed remarkable. (this is much more useful in the field than the rear shift I had with the Calumet). Also remember that the Calumet is completely made out of metal and the standards ride on a solid metal pole. I have exactly the same degree (if perhaps not even more) of rigidity with the Ebony and that is saying something.
The movements on the Ebony are like silk but also very precise. The knobs are large enough to be comfortable as well as knurled for easy operation in both hot (sweaty) or cold locations where hand coverings may be used. All the metal parts are Titanium and are smoothly machined to a dull sheen. The upright supports for the rear standard is of an appropriate thickness ( 1/8 or 3mm) to provide great strength while still being made light enough to help maintain a reasonable weight for a field camera. Also the rise and tilt of the back standard is buffered by a layer of UHMW material that can be seen as white in the pictures. UHMW material is outstanding for it's toughness and cut & wear resistance while maintaining a very low "Coefficient of friction ". In a nutshell that means that you can't injure or wear it out on a view camera but it also permits metal parts to glide past each other as if they were separated by ball bearings. An added benefit is that when you tighten the knobs after setting the rise or tilt the UHMW material allows the metal to appear to grip the metal guides firmly and as if by magic loose it's ability to easily slide & glide. This type of innovative thoughtfulness is present everywhere on this camera.
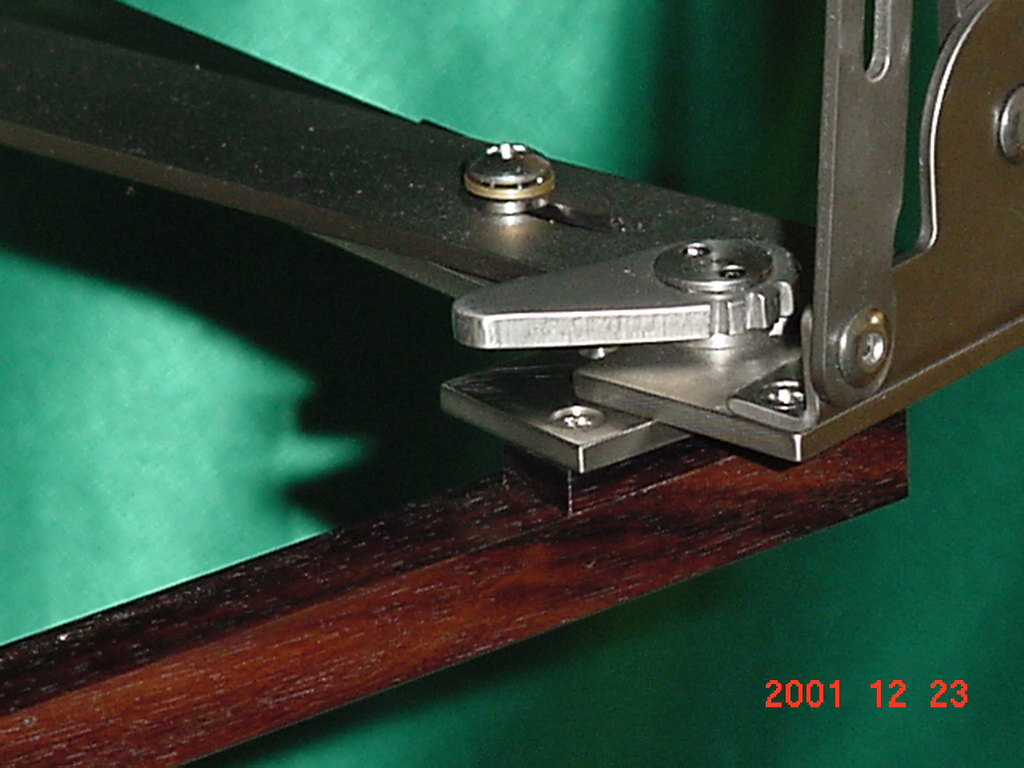
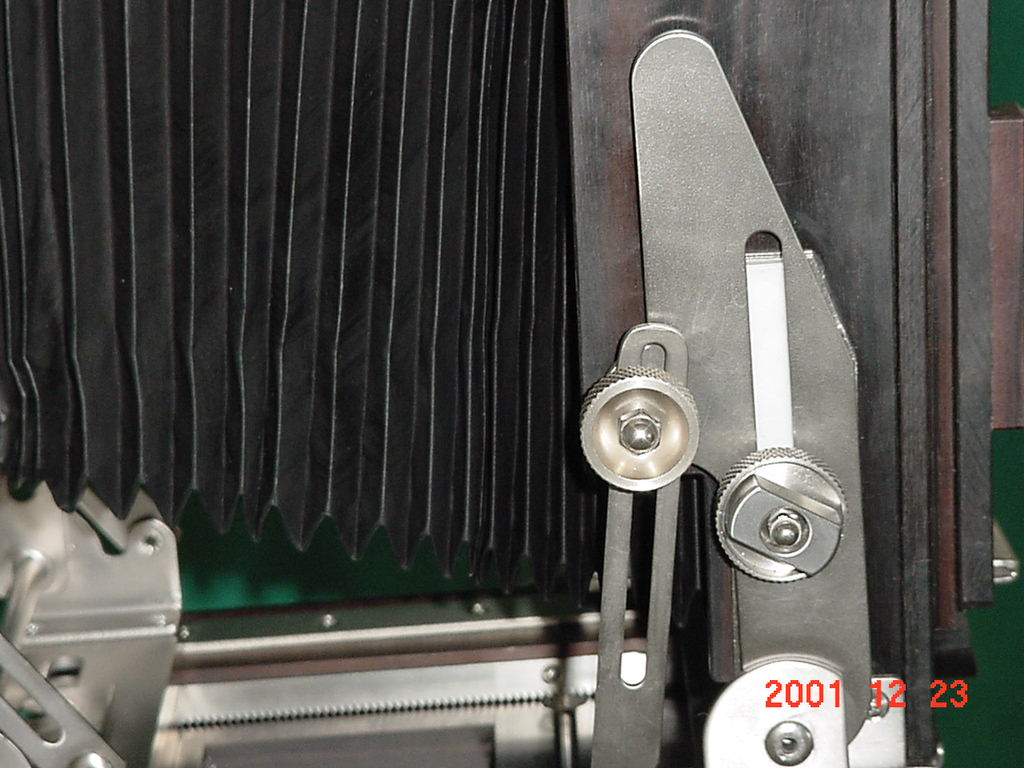
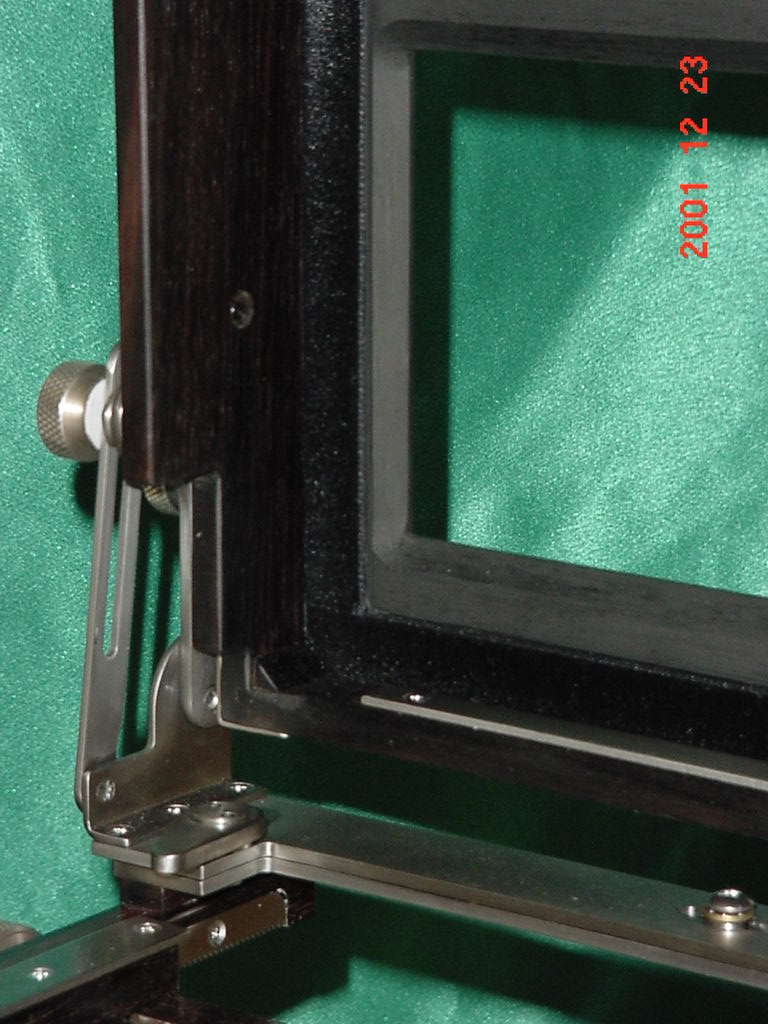
As for the rear standard movements I have discovered the following. The two titanium plates that meet at the large faces to provide tilt are machined with incredible accurate channels (2 per side) that are contoured to provide a wonderfully true and smooth tilting action. The purpose of these channels are to provide asymmetrical tilts as I understand it. Click here to find out more (Ebony Camera website) about asymmetrical tilts. These same face finishing details are also used on the bottom plates to provide the proper contoured arc for left or right swing. Most cameras that I have seen are done with a "slot and pin" solution to these problems and although that may be sufficient the added fine machining of a channel makes these movements very precise yet easy to do. As I struggle to explain these I must fall back on my woodworking to give you the proper visual picture. The slots are machined as it they were dovetails with one plate exhibiting a "tail like slot" and the other plate have a matching "pin like guide rail". This is indeed a far more precise method than I have seen on any other camera.
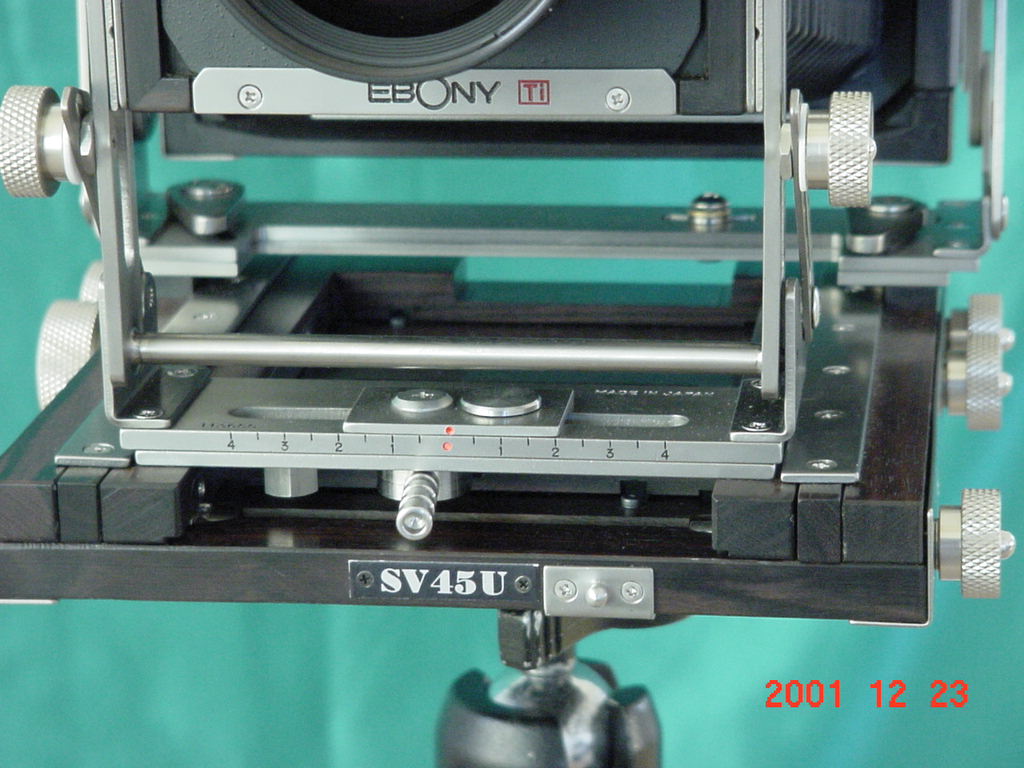
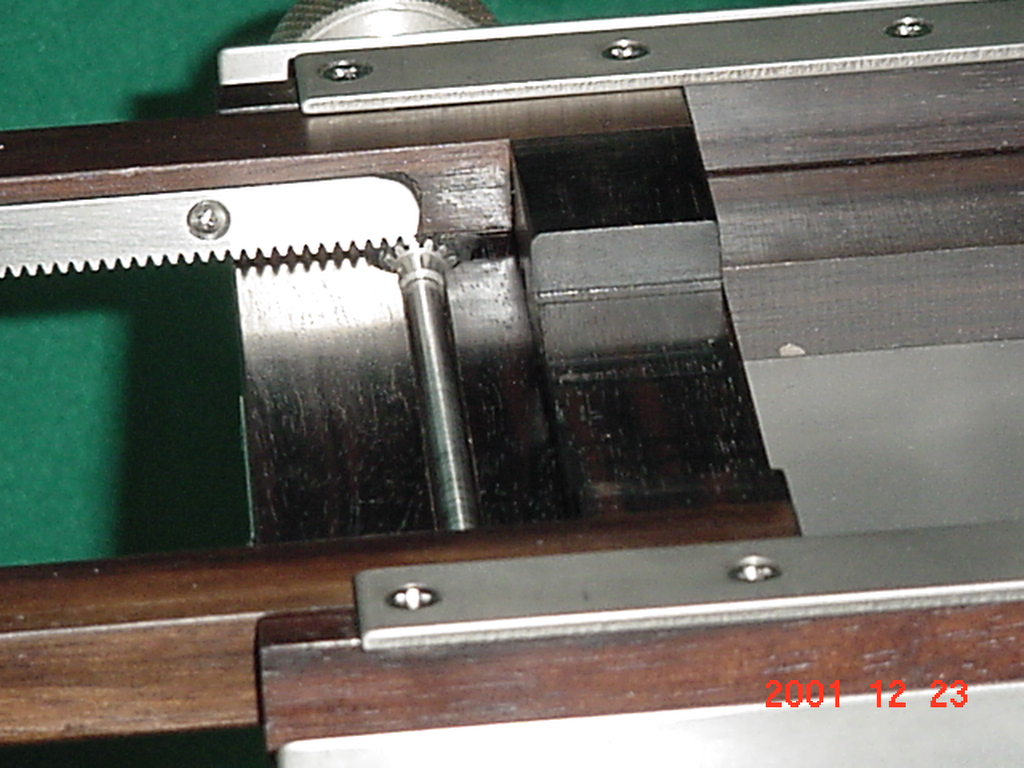
Shows the "dovetail" channels where the rear shift and tilt work from.
The rear standard has precise detents to provide an instant feedback when neutralizing the back from a previous tilting position. There is never any doubt where this is as it "clicks" into place but yet is quite easy to tilt very minutely if you desire. The swing function does not have these detents but rather you can easily neutralize the swing but feeling the two plates come into alignment with your finger and/or eye. The only aspect of the rear movements that I find awkward is loosing or tightening the rear standard after performing a swing and if the rear standard has been lowered somewhat close to the support frame. This requires a half twist which you can easily do with two fingers by using two cam levers located under the camera body but above the two metal plates of the rear standards. If you were to lower the rear standard as far as it would go then these "cam levers" become a bit more difficult to reach. It is still possible but just requires a bit more dexterity than normal. My how fussy I've become once I have gotten use to the wonderful easy movements.
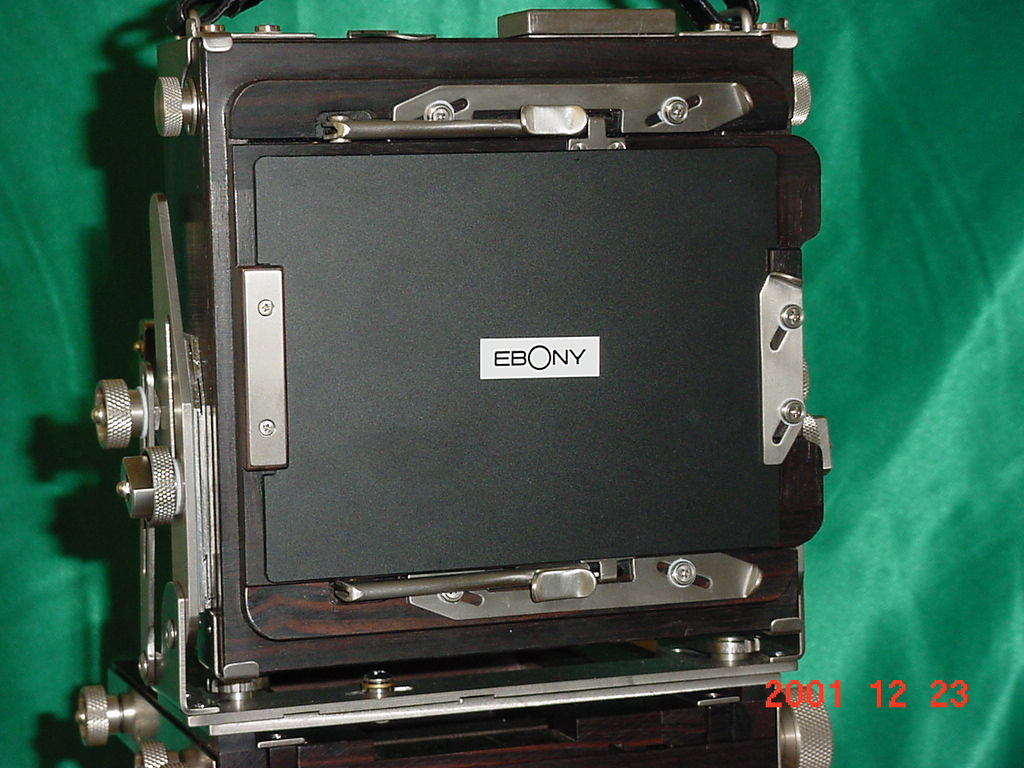
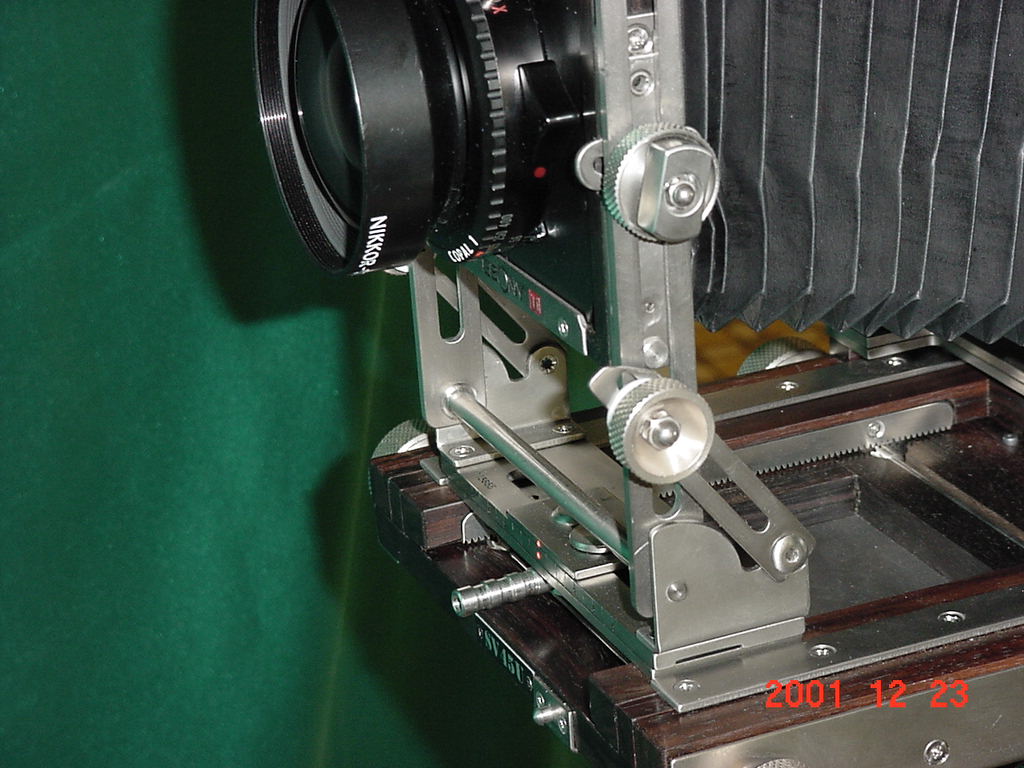
Shows the lever that you use to release and tighten the rear swing.
More pictures by selecting:
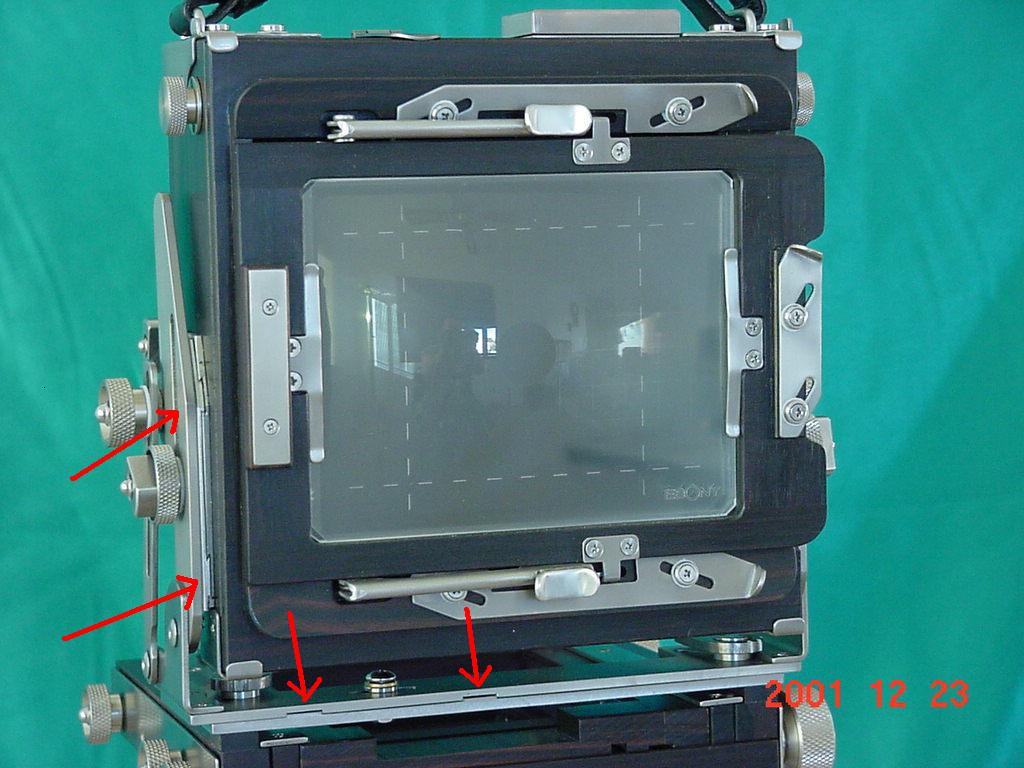
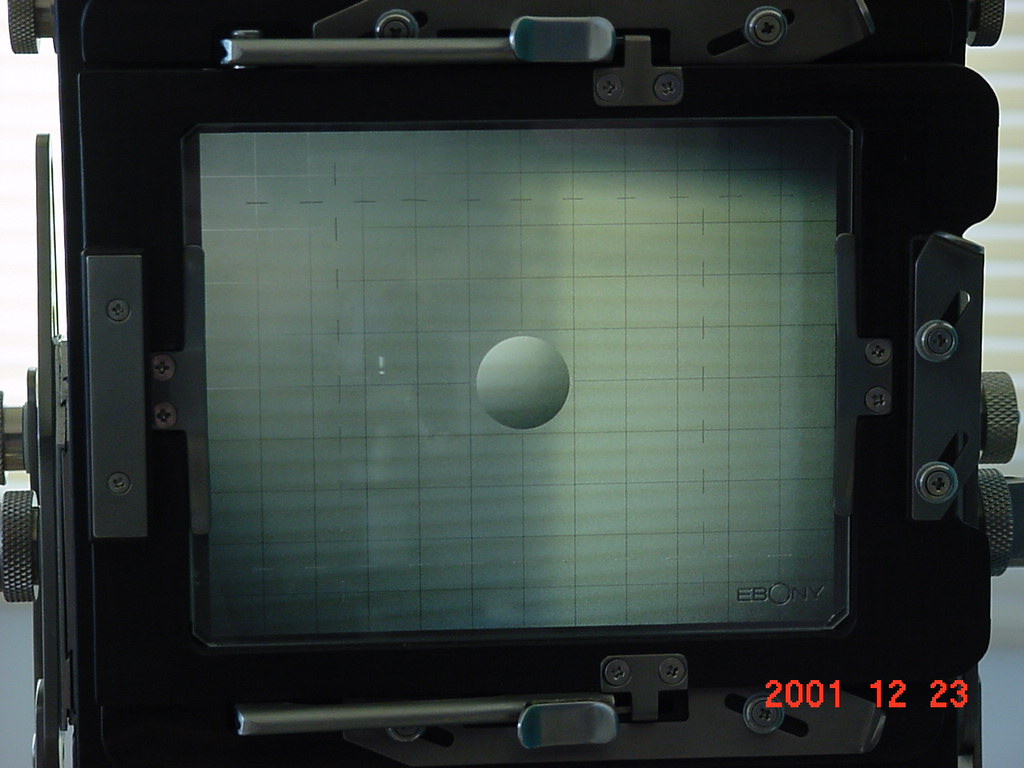
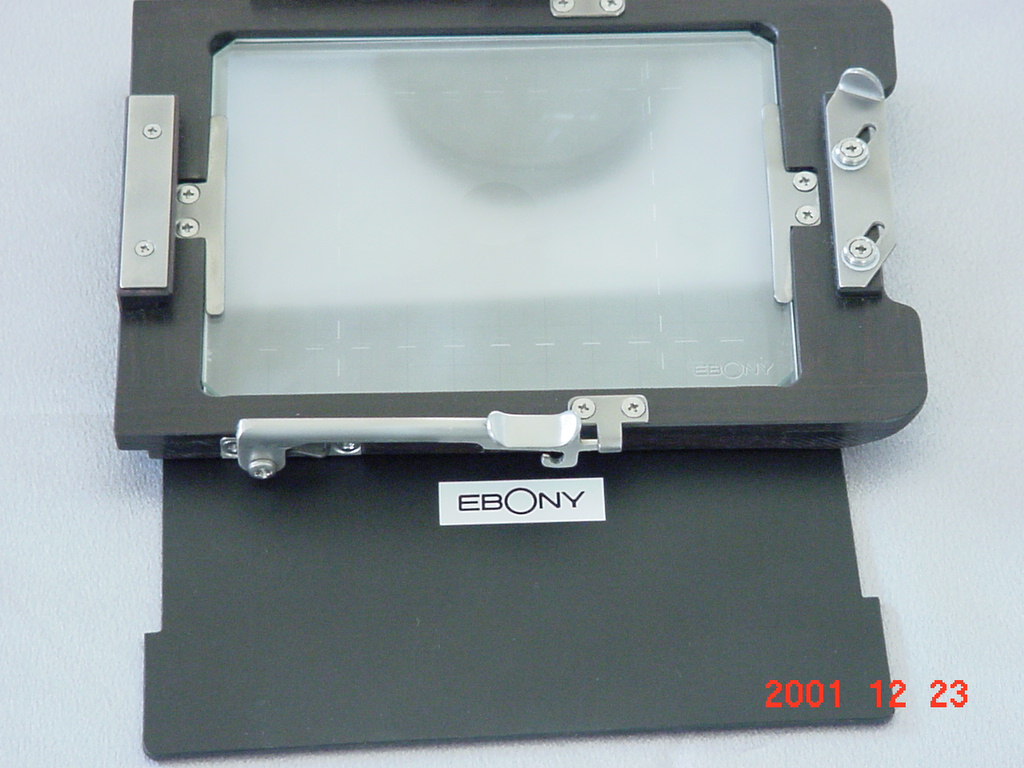
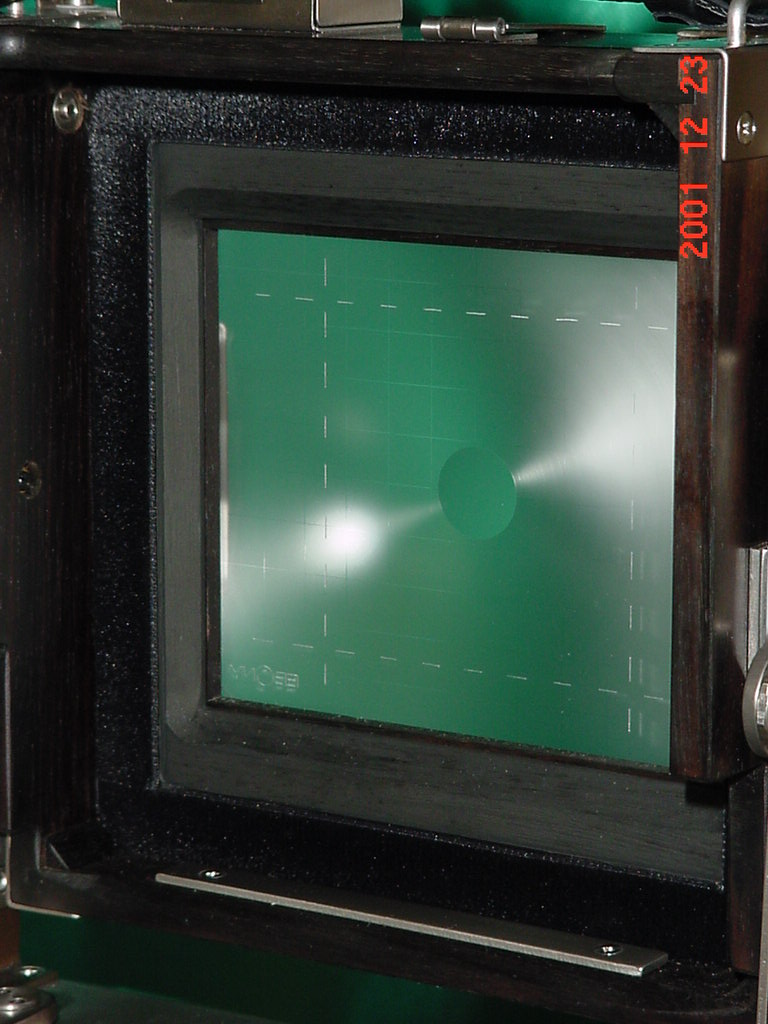
The camera accepts all Graflock type backs (check with Ebony to be sure) and it is very easy to remove the back to attach say a roll film holder. There is both a lever above and below the ground glass that with a slight finger pressure and sliding a1/2 inch movement to the right the back easily comes right off. To re-install just reverse the procedure and it easily snaps back on. The whole back plate comes completely off also by sliding two small levers at the top of the rear standard. This would making cleaning very easy and perhaps there are other backs that can be attached. I don't know this and will leave that information for perhaps another reviewer.
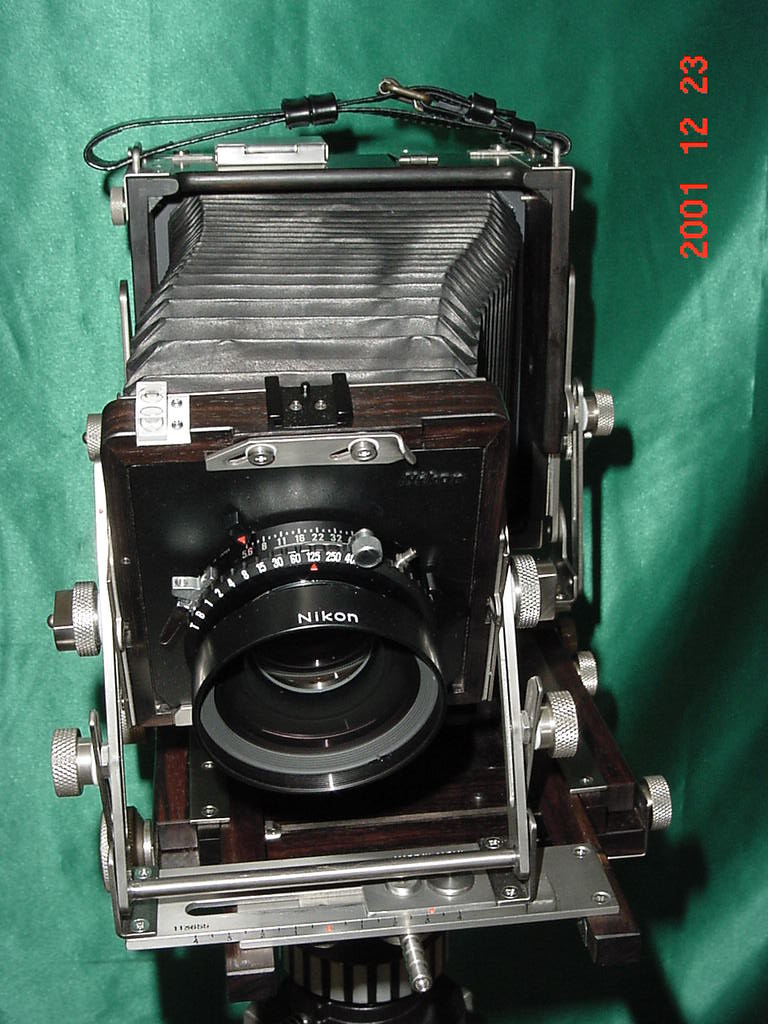
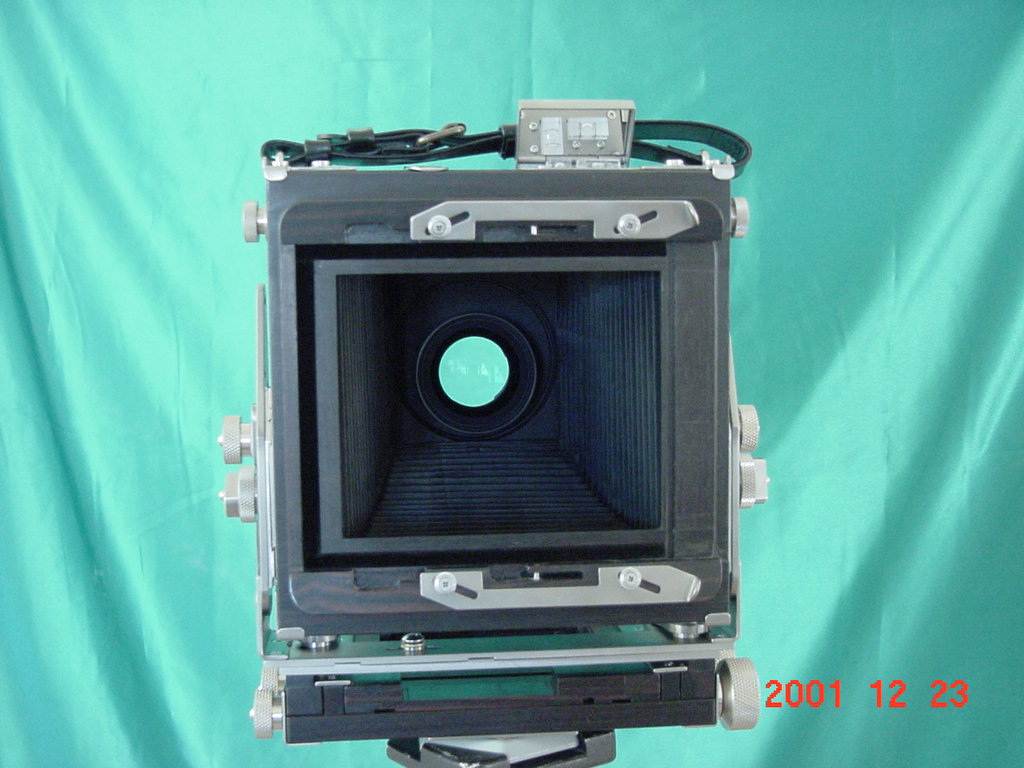
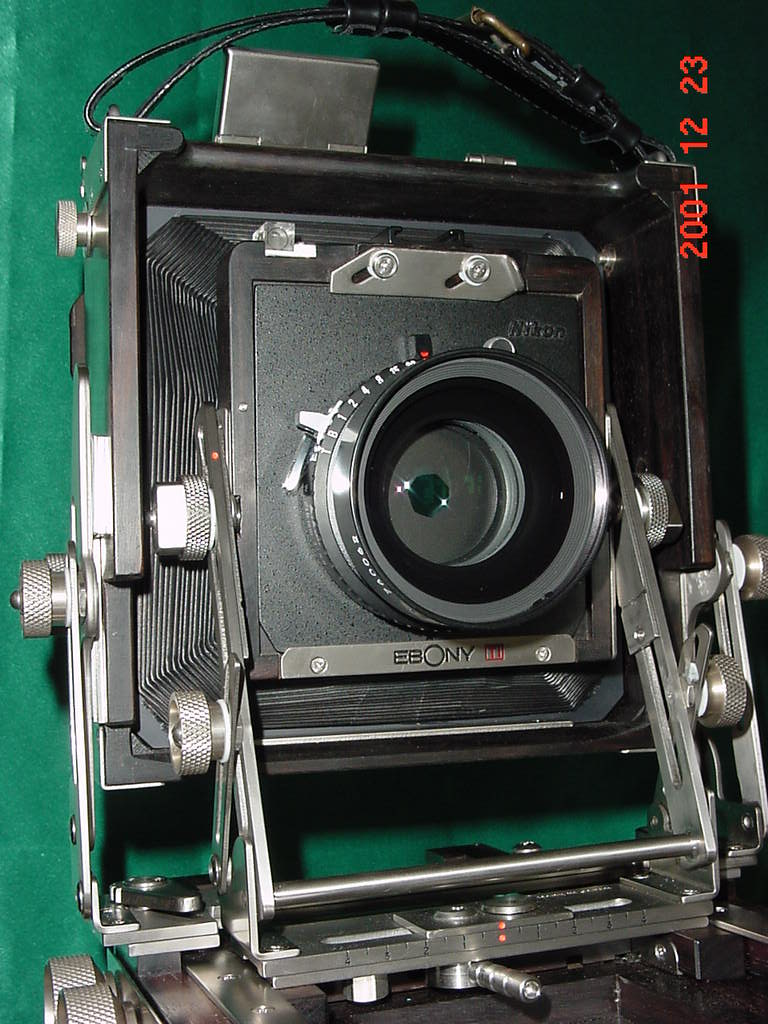
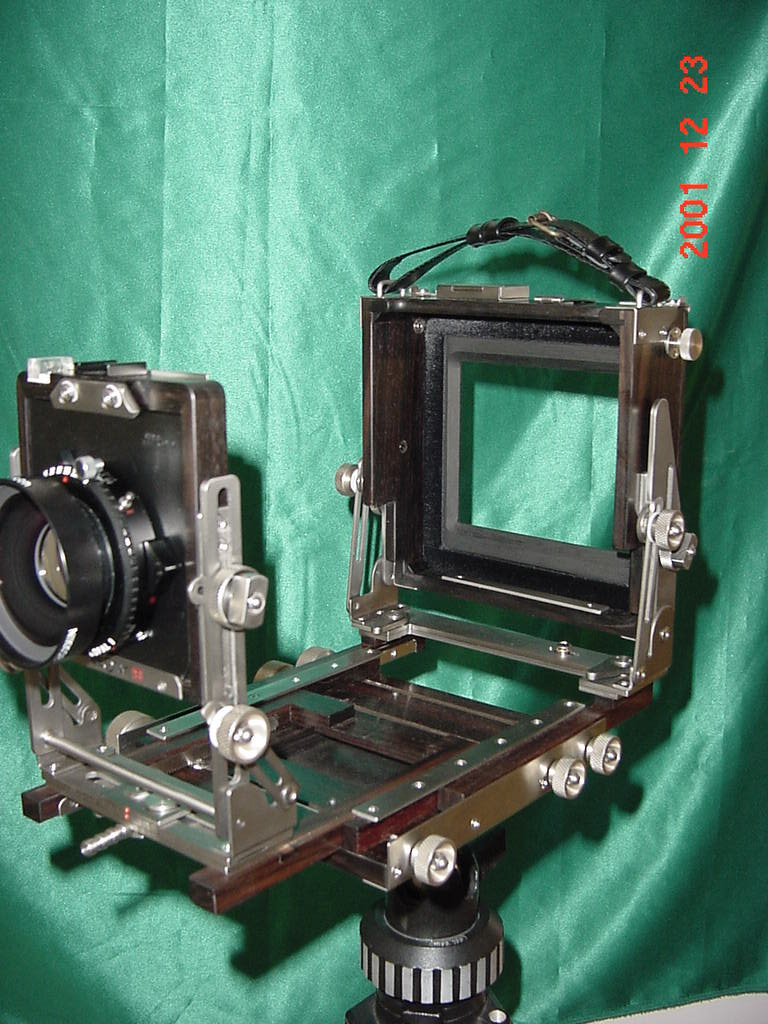
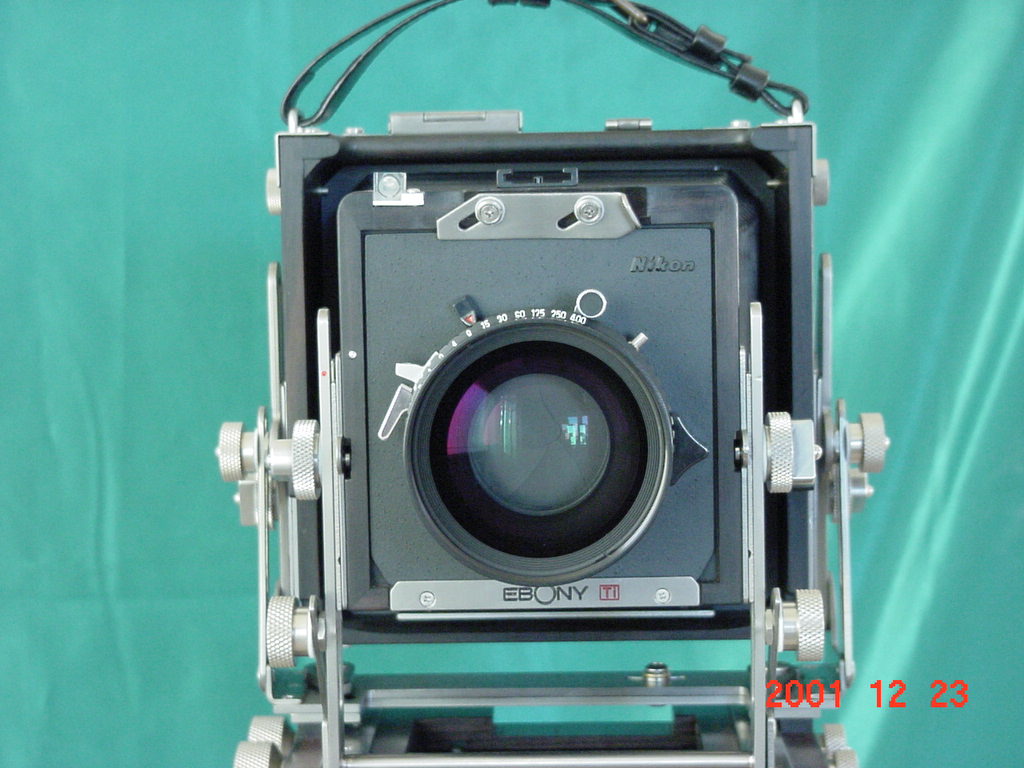
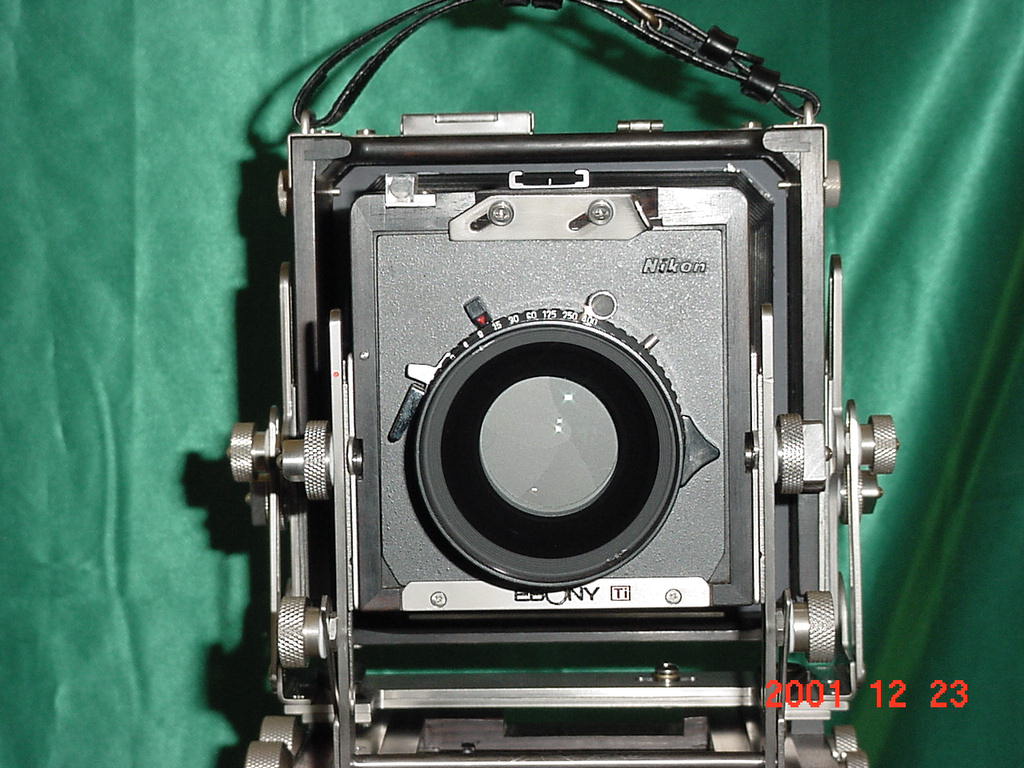
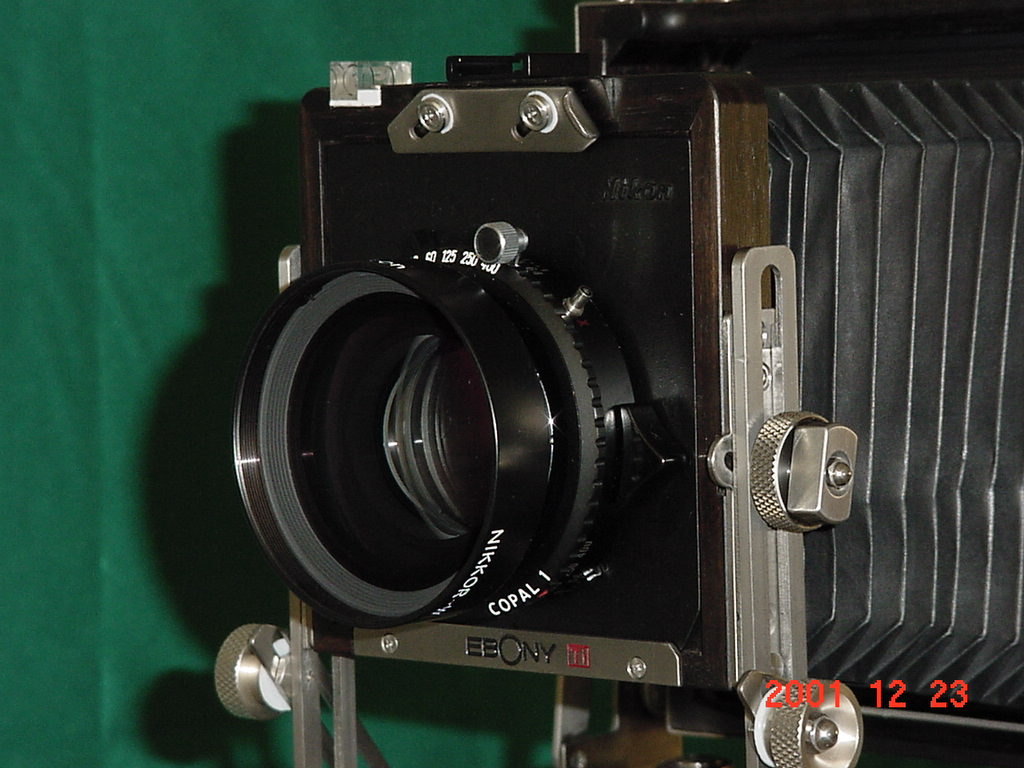
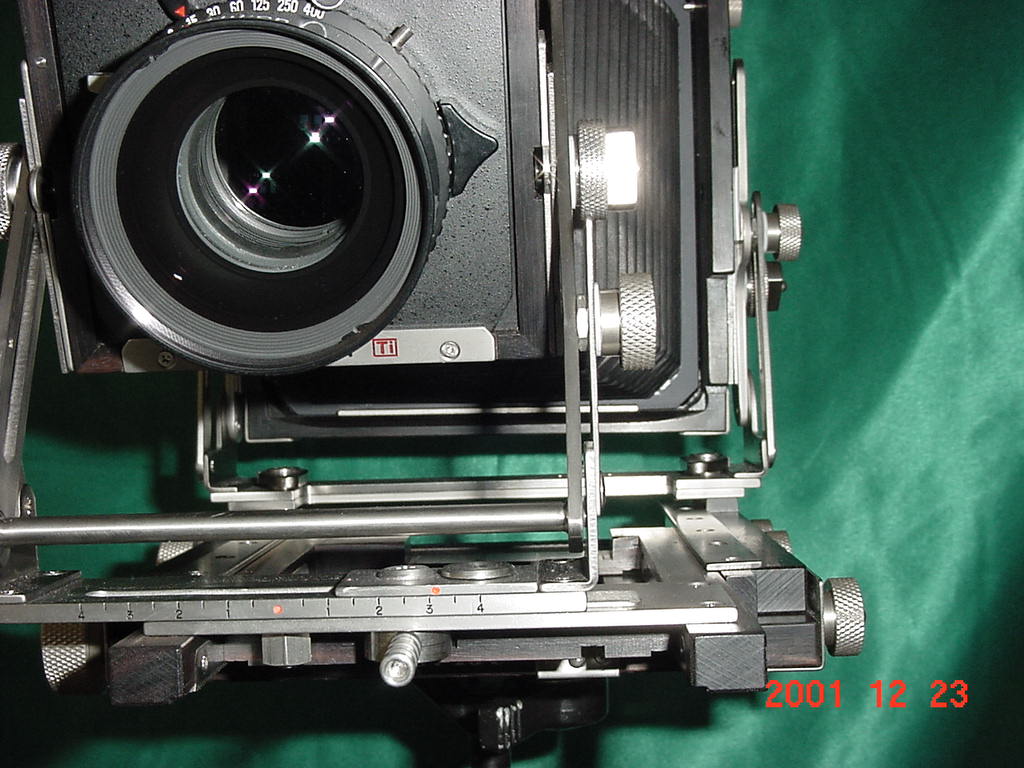
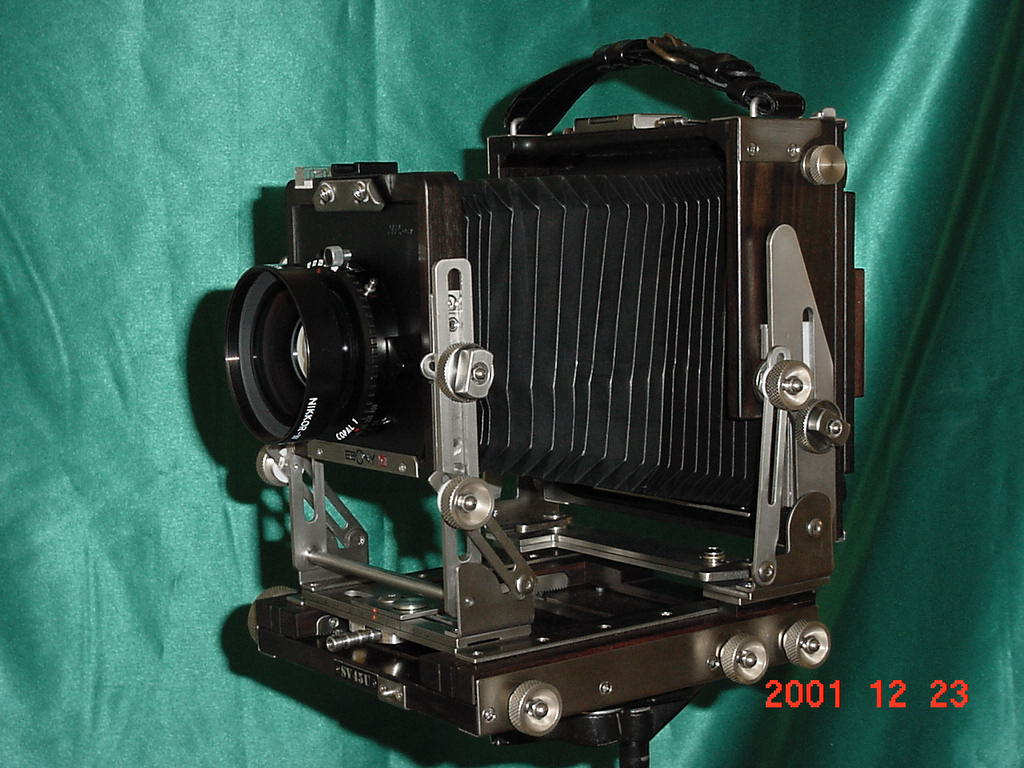
The camera comes with what is termed a "Universal Bellows" which is a highly flexible, robust material that allows quite a bit of movement. I have easily used this camera with my 90mm Super Angulon with quite a bit of tilt and shift without and problems. Since the time I wrote this original review I have had an opportunity to try the camera with a Rodenstock Grandagon 75mm lens. I was able to easily focus to infinity and beyond. At this point the front lens standard is quite recessed into the back standard and I would realistically only expect to be able to do a reduced amount of movements such as swing, rise/fall and tilt. Tilt is by far the easiest to accomplish when like this and I could tilt the lens much further than I required to be able to increase the depth of focus and keep both foreground and background in focus. Just to test the limit in the pictures you can see that I have a Nikkor-W 210 on the camera (which is my largest physical lens) and I brought it as close as I could to the rear standard while still permitting me to do some tilt. I used the Nikkor lens because it's size would seem quite comparable to other wide angle lenses that I do not own but have seen.
A view showing the front standard recessed into the rear standard for wide angle lens
Another view showing how the front standard tilts up and back to achieve this without a bag bellows
Tilt is the movement I am most likely to use in the field as I typically wish to increase depth of field. I took the ground glass off and measured from the lens board to the film plane and arrived at 50mm as the distance. As you can tell by the pictures the front lens standard is part way into the rear housing when this is done. The only additional feature a bag bellows may offer (one is available) is perhaps easier rise/fall and swing. I believe that if swing is what you wanted to achieve with the lens standard so far recessed into the rear standard then you would probably use the rear standard swing to obtain the result you want. Of course from my limited experience that might change the perspective of the image but that is what I would do. Of course that does not necessarily make it correct.
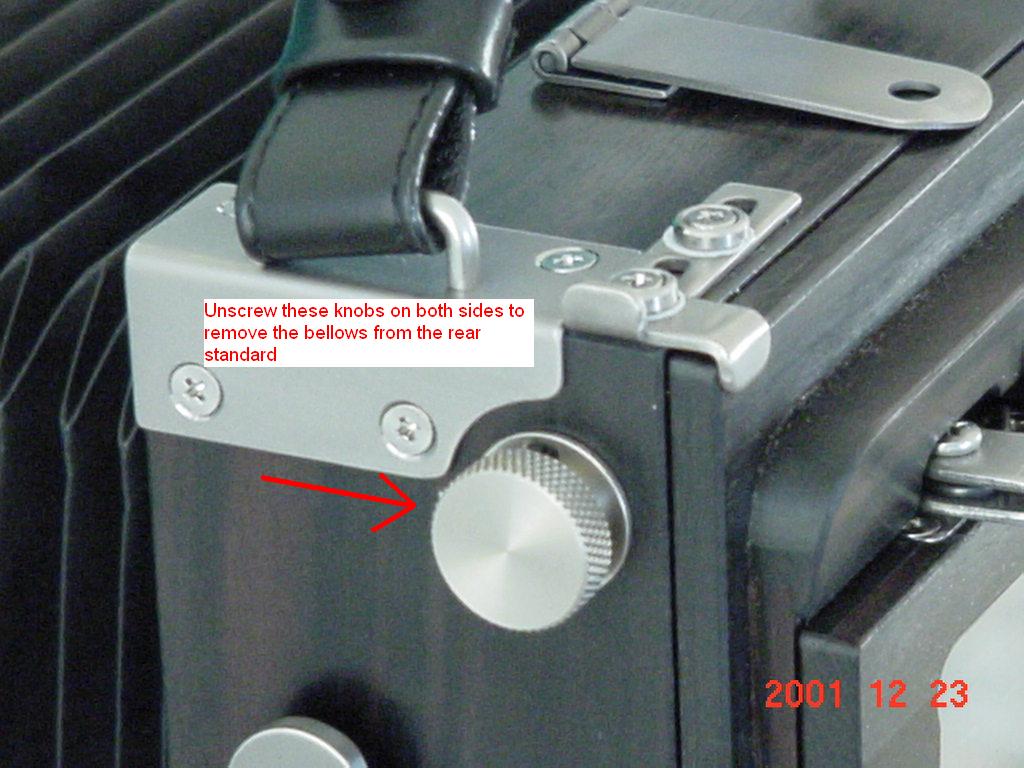
The bellows is also very easy to remove from the standard. I once had some one show me their Arca-Swiss view camera and how to detach the bellows and I can tell you that the bellows removal on the Ebony is as least as easy if not easier than the Arca-Swiss. Loosen two small knurled knobs on the rear standard and slide a small plate on the front lens board and it is off. Easy to disassemble for cleaning or switching with a bag bellows. This is one of those silly moments where I want to tell you that in 3.9 seconds I can have it off. Of course that was just counting in my head and I'm not that precise on the "tenth of a seconds" as I sometimes blink during counting and that throws me off a bit.
The final aspect of the standards that I would like to share is the joinery (how the box is assembled). This was done with a great deal of thought in regards to durability and rigidity. The corners of the wood are lap joined together to provide a maximum strength corner. To prevent the box shape from shifting into a slight parallelogram each corner is reinforced with a proper corner block and glued into place. This provides a maximum amount of support on the inside. The outside corners are all reinforced with titanium "L-shaped" brackets and properly screwed and secured in place. Although some might not think that this is of much importance if you want your movements to stay true and smooth, or your Graflock back to sit tight and secure and even your bellows to maintain it's light tightness over the years then it all starts with a solid square box as a foundation to build on. Obviously the people that build Ebony cameras are truly craftsman in the highest degree in that they understand that each small but unnoticed detail can have a large impact on the longevity, functionality and durability of their products.
The lens standard is also a marvel of careful yet simple engineering to provide the quality movements like the rear. All the machined parts are up to the high standard of finish as well as properly assembled to provide a smooth operation and matching of the various assemblies. The only unique aspect of the camera that I had to learn was the unfolding and folding procedure. The front uprights have a grooved slot on the inner part of the metal where a pin on the inner panel passes through. These pins on both sides travel vertically up and down the upright rail and this I believe is part of the design structure for tilts for the front standard. The thing I had to learn was to make sure that each time I opened the camera to raise the front standard and have these pins go into the slots before lowering the standard to a neutral height. Also when folding up the camera always raise the front standard all the way to the top so that the pins exit the front standard so that you may tilt the lens board back for folding up the camera. You are probably scratching your head by now and asking "what the heck is he talking about". Well that is how I first felt the day I got the camera. As perplexing as this may sound at first I did not seem to be able to fold the camera back up. After spending a good hour examining and tinkering (and finally reading the directions) I understood how it was done. Once learned it is quite a simple task but I caution you that it is possible to fold it up improperly and that is definitely not recommended.
The lens standard has positive detents for tilt and they feel very positive. I am quite thankful that they are positive in nature because I tend to attempt to use front tilt quite extensively to alter my depth of field. I found no problems moving the lens standard just the slightest if desired even though there are positive detents readily there. This is just another indication of great engineering while still providing the best of functionality. The front has shift that is easy to use by a front lever that is obvious in the pictures. There are two red dots that permit easily returning to the center position. This shift movement is the only one that does not seem to be silky smooth. Do not get me wrong it is still very easy to do just not silky smooth. The front also has positive detents for swing so centering the lens board is a breeze. The one thing that you must remember when opening the camera is to lock down that front lever because normally it must be released and swung inwards for the camera to be folded up. When I first started using this camera I got caught by that a few times and forgot to lock down the lever. The whole front assembly both tilts front wards and backwards and has a positive position for locking so as to be parallel to the back. These are small notches in the guide rails that permit the tilting. The rear standard has the exact same type of guide rails with the notches to provide a neutral or parallel position with the front standard.
The front standard has a small level attached to the top as well as a top bracket that resembles "hot shoe" plate for a flash. The intention of this bracket is not for a flash but rather for attaching a "shading card". The bracket does accept one of my smaller electronic flash units and I have had fun using it there with a PC cord attached to the lens. In regards to the level on top of the standard it is recessed into the lens standard and not just glued on but rather held firmly by two tiny screws. Another detail where the concern over quality and durability is prevalent. It would have been much easier to glue or even "glue & screw" the front level on but over time glue ages and eventually it would get loose and come off. By recessing the level in it's own slot the added support from the edge of the wood will prevent it from ever becoming loose and being dislodged. This type of thing is important to me because I use the "level bubble" on the front standard quite a bit when setting up.
The front standard has a silver dot on it that would seem to line up with a red dot on the front upright rails. At that position it would seem that you are at the midway point on the possible rise and fall movement permitted. What is perplexing is that the rear standard has no such markings. The only way to tell if the rear standard is about midway is by making a visual evaluation. So far this has worked for me and I'm not sure if it is important that it is exactly centered to begin with. Somehow I doubt that it is but I've been wrong before. Moving on , the front lens tilt is very smooth and can be done by loosening the tensioning knobs on the inside of the knurled knobs used to raise the standard. I use front movements quite a bit in the field and so each of these are high on my importance list. I have been experimenting with all the movements including base tilts. I really wanted to test the asymmetrical tilts the most when I got the camera and I can now say it seems to be worth every penny for what I have been able to learn so far. Tilting and focusing are much easier this way and I am just at the "tip of the iceberg" in properly learning how to use these.
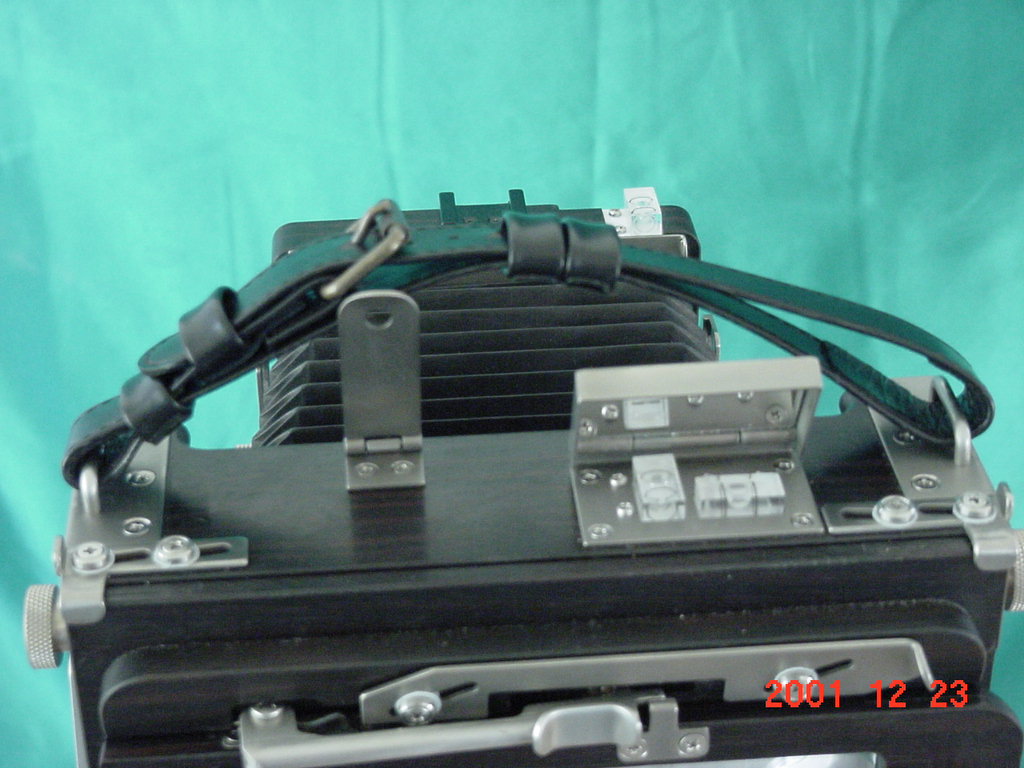
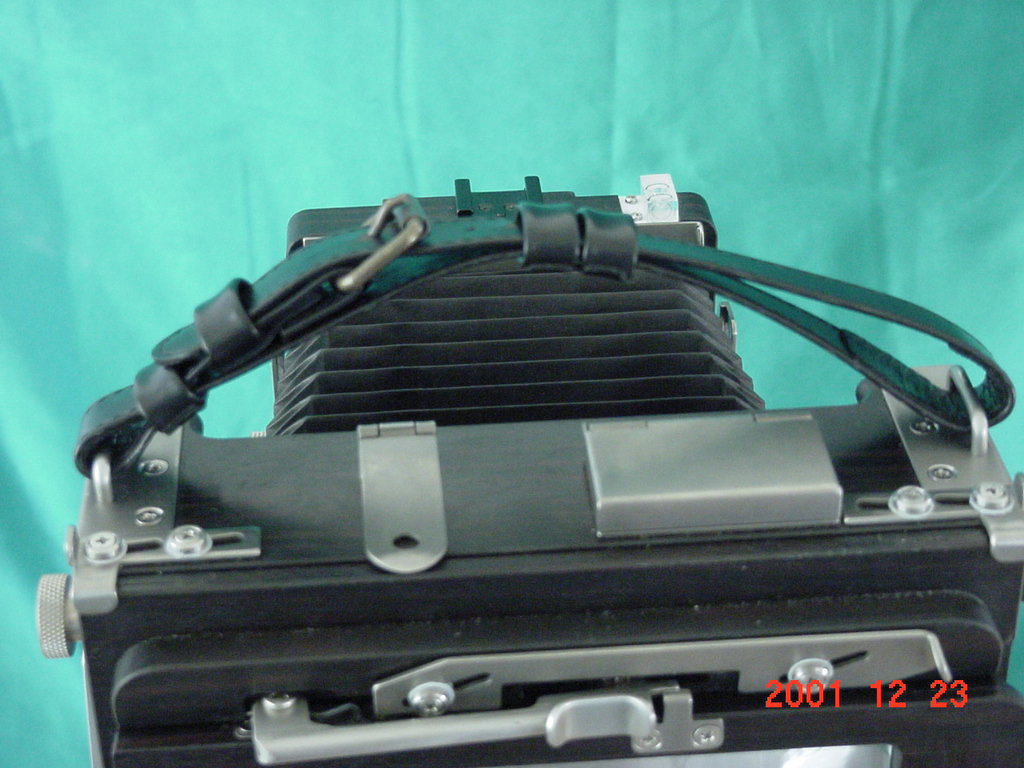
There are only a few last things I want to share with you before offering my recommendations. The first is that having the camera made of Ebony wood is an excellent idea. The wood is very strong and hard , has very little movement (shrinkage or warps) when properly cut, assembled and finished and finally is incredibly beautiful to look at. The finish is a dull sheen suitable for a camera but it speaks of a deep rich quality look. The rear standard has on top two bubble levels in a protective case with a mirror on the inside. (see the pictures). This is a handy feature if you like using your camera at eye level on the tripod. The geared rails and their respective gears are well machined and work smoothly through their entire range. It is impossible to run either standards off their rails as the designers have made sure to incorporate safety stops. to prevent this. Even though it is not an Ebony item the Nikon lens boards I use are perfectly made for this camera and are equal in functionality and quality to the Linhof boards. I get them from Jeff at Badger Graphics at a very attractive price. The latch that is used to hold the camera closed has just the right amount of tension to keep it close yet does not require a screwdriver to leverage it open provided you have discovered the proper open and closing procedures. For the extra bit of weight this camera may weigh over other lighter field camera the quality and ease of use are well worth the trade-off in my opinion. I only day hike and would rather leave behind an extra bit of food (which anybody who knows me will tell you that doing without a bit of extra food could possibly help me) than to select a lighter camera and loose the quality and functionality.
You probably are not the kind of person who wants a well honed tool to help you perform for a lifetime as you become intimately familiar with it's every silky smooth operation. I would recommend that you buy something adequate that you could learn from so that when you trade it in (maybe loose a little money on the deal) you would be able to get a bit better of a camera with perhaps a feature or two more you would like. Then every couple of years you could trade in again and get a brand new toy to play with. Also I admit being a bit selfish in that I want my Ebony to continue to increase in value as it becomes even more rare into the future. I want my children to inherit a heirloom which can be quite rare and retain a high value well into their lifetime. Only a fool would tell others of such a wonderful find only to have his own diminish in notoriety and fame not to mention future unique value.
Aw....what the heck....in the Spirit of Christmas and goodwill towards men .....I going to show my Christmas spirit and tell you honestly that for a field camera you will not get a better quality deal anywhere for such a lifetime camera. Go ahead ..give yourself a Christmas present and buy yourself one.
Merry Christmas to all my friends on the LF site.
GreyWolf
After becoming comfortable with LF and exploring two cameras I decided it was time (August 2001) to consider a replacement and long term solution for a camera that I could both pack as well as meet all my needs both real and those perceived into the future. Like most others I scoured websites, read related posts and opinions and made contact with a few sales people. The difficulty for me was that I live in Canada and not particularly near to any dealer who carries LF gear. I also do not travel very much so my decision would have to most probably be based on "site unseen" commitment. The two most common dealers were both very friendly and helpful but I was wonderfully delighted to learn that I could communicate directly with the makers by contacting them through Ian Wilson, the western representative for Ebony. Ian is a wonderful person who quickly got our emails on a casual level and encouraged me to ask any and all questions before making a decision. This was a important process for myself as once I spent my money any decision would be difficult if not perhaps impossible to reverse. I wanted to be as sure as I could before buying the camera I felt was right. My hat is off to Ian for responding in a very amicable and timely fashion to all of my detailed questions.